Decision Matrix
Choose the right lane
Use this as a quick navigation board: scan each fight or build decision, then jump to the full breakdown and source frames below.
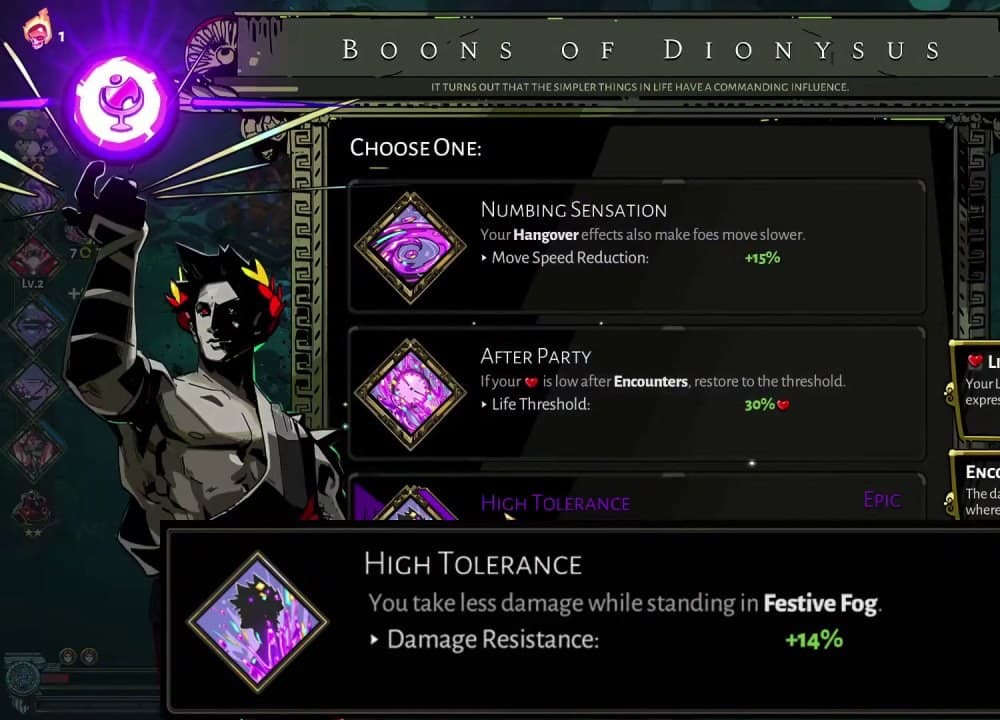
Damage while moving
The value of Hangover is not only its number. It changes how a fight feels because you can apply stacks, dodge a pattern, and still progress the health bar. This is why Dionysus is comfortable for players who are still learning when to leave a boss window.
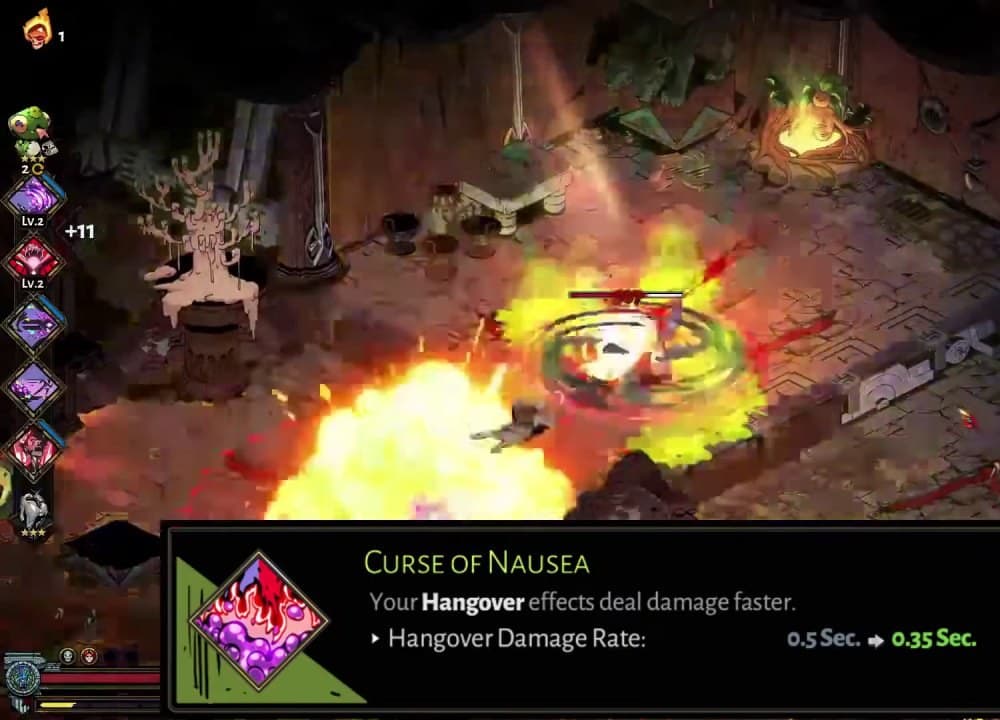
Best weapon behavior
Fast attacks, multi-hit specials, and weapons that can safely tag an enemy several times love Dionysus. Slow single hits usually prefer Aphrodite, Artemis, or raw scaling unless the build is chasing a specific Duo or Festive Fog plan.
Hangover is a stacking plan
Dionysus feels weak when Hangover is applied too slowly or to the wrong button. He feels excellent when one fast action keeps stacks active while you dodge. Fists, Rail, fast Specials, and safe Cast or Festive Fog routes can let damage continue while you focus on survival.
Why Dionysus helps first clears
Damage over time is forgiving because it pays you while you are moving away. That makes Dionysus useful for players who understand openings but cannot stay close safely yet. The goal is not to stand still and watch poison tick; it is to apply stacks, leave cleanly, and reapply before the pressure falls off.
Quick Verdict
Dionysus is forgiving because Hangover keeps working while you move. He is strongest when a weapon can apply stacks quickly, then back away while damage over time continues. For beginners, that makes him a calm alternative to greedier burst builds.
Use Dionysus on fast or repeated-hit buttons that can stack Hangover quickly.
After stacks are applied, move safely instead of standing still to force extra hits.
Pair Hangover with defensive dashes or debuffs so bosses cannot punish the slower kill speed.
Pre-Run Checklist
How to test Dionysus Boons Guide in the next run
Damage continues while you dodge, which is why Dionysus is so friendly to learners.
Plan
Compress Dionysus Boons Guide into one next-run plan
Use Dionysus on fast or repeated-hit buttons that can stack Hangover quickly.
Check
Damage while moving
Test
Change one variable so the test means something
Use Dionysus on fast or repeated-hit buttons that can stack Hangover quickly.
Check
Next read: Hades Boon and Build Planning Guide
Review
After failure, identify the most expensive mistake
Trying to use Hangover like instant burst damage.
Check
Next read: Twin Fists of Malphon
Player Intent Router
Choose the section that matches your current wall
High-retention guide pages do not force every player to read linearly. They help the player name the problem, act on it, then continue into the next useful page.
01 · Fast route
You want to turn Dionysus Boons Guide into the next run plan
The first job of a guide page is reducing hesitation. Take one route you can execute instead of trying to memorize the whole database.
Page action
Use Dionysus on fast or repeated-hit buttons that can stack Hangover quickly.
02 · Decision point
You are choosing between several good-looking options
Choose the option that solves the current wall. Rarity, tier-list strength, and flashy clips should come after the run problem.
Page action
Use Dionysus on fast or repeated-hit buttons that can stack Hangover quickly.
03 · Review loop
You tried it, but results are still inconsistent
Change only one variable in review: opener, main button, keepsake, boss plan, or resource order.
Page action
Trying to use Hangover like instant burst damage.
Field Guide
How to use this page
Dionysus Boons Guide should not be treated as a trivia entry. Use it as a route decision before the next run: identify the current wall, then choose the lowest-execution answer that solves that wall.
If the problem is survival, prioritize safer spacing, keepsakes, Mirror choices, or weapon rhythm. If the problem is damage, identify which button carries the build. If the problem is resources, spend on upgrades that improve several future runs instead of only the current attempt.
Screenshots and video references are support material: they help you read tells, spacing, reward locations, or build direction. The written conclusions are the part to carry into the run.
Before entry
Use this Guide page to name the real job first: survival, damage, resources, or route clarity. A specific job keeps the run from being pulled off course by rarity, flashy clips, or tempting side rewards.
During the fight
Compress the advice into one action rule: wait for the tell, preserve spacing, clear adds first, take the core boon, or leave before greed damage begins. Good guidance should survive a messy screen.
After failure
Do not only ask whether the damage was high enough. Ask where health started disappearing, which reward did not serve the route, and whether the next run needs a different keepsake, Mirror setup, aspect, or starting god.
After reading Dionysus Boons Guide, do not jump straight to an unrelated entry. Test the advice in one run by changing a single variable: starting keepsake, primary damage button, boss phase plan, resource spending order, or the positioning shown in the reference frames. That makes the next review cleaner because you can tell which change actually improved the route.
If you only remember one rule: Dionysus Boons Guide is useful because it reduces hesitation in the next run. Anything that helps you decide when to attack, retreat, reroute, or preserve resources is what actually improves clear consistency.
A database page works best when it turns small decisions into a stable route. Read this page, follow the related entries, then test the idea in one escape attempt so the guide becomes practice rather than trivia.
Takeaways
- 01
Use Dionysus on fast or repeated-hit buttons that can stack Hangover quickly.
- 02
After stacks are applied, move safely instead of standing still to force extra hits.
- 03
Pair Hangover with defensive dashes or debuffs so bosses cannot punish the slower kill speed.
Strategy Path
What to read next
Do not leave Dionysus Boons Guide as an isolated note. Follow the route below to turn one useful answer into a complete escape plan.
01 · Build the route
Hades Boon and Build Planning Guide
After Dionysus Boons Guide, use Hades Boon and Build Planning Guide to check the next decision layer: A good Hades build starts by deciding which button deals damage. Then you pick gods that scale that button, use keepsakes to control the first god, and avoid taking shiny boons that do not help the run’s core job.
02 · Build the route
Legendary, Duo, and Heroic Boons Guide
After Dionysus Boons Guide, use Legendary, Duo, and Heroic Boons Guide to check the next decision layer: Powerful boons are not pure luck. Legendary and Duo boons sit behind prerequisite chains, god-pool control, and rarity pressure. If you know which gods and core boons are required, keepsakes and rerolls can turn a run from random shopping into a planned build hunt.
03 · Choose the tool
Twin Fists of Malphon
After Dionysus Boons Guide, use Twin Fists of Malphon to check the next decision layer: Use Fists when you can dash with purpose. Stack strong attack or special effects, respect boss tells, and leave before close-range uptime becomes a trap.
04 · Build the route
Hades Beginner Guide: First Clear Route
After Dionysus Boons Guide, use Hades Beginner Guide: First Clear Route to check the next decision layer: First clears are usually won by survival economy, not perfect damage. Spend Darkness on extra lives and dashes, unlock defensive keepsakes, choose one or two build goals, and treat every boss as a lesson in leaving early.
Change one variable at a time along this path: setup first, boon route second, boss phase handling last. That makes it easier to tell which adjustment actually improved consistency.
Run Study Board
Turn the guide into one playable review loop
This page compresses 2 source references and gameplay frames into three steps: watch, apply, and review.
01 · WatchRead the danger in the frame first
The value of Hangover is not only its number. It changes how a fight feels because you can apply stacks, dodge a pattern, and still progress the health bar. This is why Dionysus is comfortable for players who are still learning when to leave a boss window.
Frame action
Dionysus rewards landing a few safe hits, then resetting before the boss answers.
02 · ApplyTurn the advice into one next-run change
Use Dionysus on fast or repeated-hit buttons that can stack Hangover quickly.
Frame action
Use Dionysus on fast or repeated-hit buttons that can stack Hangover quickly.
03 · ReviewReview the most expensive repeated mistake
Trying to use Hangover like instant burst damage.
Frame action
Apply stacks with a fast button, then move before the answer.
Tactical Drill Table
Convert Dionysus Boons Guide into four playable checks
This is not an encyclopedia summary. It is a next-run drill card: what to look for, what to do, what to avoid, and which page should fill the next gap.
01 · Observe
Turn Dionysus Boons Guide into one question
If you see
You read several tips but still do not know what the next run should test.
Do this
Use Dionysus on fast or repeated-hit buttons that can stack Hangover quickly.
02 · Commit
Test only one variable
If you see
The value of Hangover is not only its number. It changes how a fight feels because you can apply stacks, dodge a pattern, and still progress the health bar. This is why Dionysus is comfortable for players who are still learning when to leave a boss window.
Do this
Use Dionysus on fast or repeated-hit buttons that can stack Hangover quickly.
03 · Avoid
After failure, record the costliest mistake
If you see
The result is inconsistent, but the failure point is still vague.
Do this
After stacks are applied, move safely instead of standing still to force extra hits.
Do not
Do not interpret one failed attempt as proof the whole route is wrong.
Next: Twin Fists of Malphon04 · Pivot
Use the next page to fill the route gap
If you see
This guide solved one layer, but weapon, boon, boss, or resource gaps remain.
Do this
Pair Hangover with defensive dashes or debuffs so bosses cannot punish the slower kill speed.
Do not
Do not expect one page to answer every layer of a run.
Next: Hades Beginner Guide: First Clear RouteBuild Synergy Board
Connect this page to a full route
Readers often leave when the page does not answer what to pair next. This board connects the advice to gods, keepsakes, weapons, resources, and the next guide.
Starter plan
Turn Dionysus Boons Guide into the next route
Pair with
Hades Boon and Build Planning Guide
A guide page is useful when it removes one decision from the next run instead of asking the player to memorize everything.
Page check
Use Dionysus on fast or repeated-hit buttons that can stack Hangover quickly.
Build lock
Lock only one build direction at a time
Pair with
Legendary, Duo, and Heroic Boons Guide
Specific routes create useful review. Change one build variable at a time so the result actually teaches you something.
Page check
Use Dionysus on fast or repeated-hit buttons that can stack Hangover quickly.
Next gap
Use the next page to fill the missing layer
Pair with
Twin Fists of Malphon
After this page solves one problem, the best next click should target the remaining gap instead of sending the reader back to search.
Page check
Trying to use Hangover like instant burst damage.
Build Pivot Map
Recover the run when the key piece misses
A useful guide should not only name the perfect build. It should show how to save the run when a boon, hammer, or aspect choice misses. Read the signal, repair the gap, then pivot before the boss wall.
| Lane | Build signal | Missing piece | Pivot target | Recovery link |
|---|---|---|---|---|
| Hangover works when the weapon can reapply stacks while you keep moving, then spend boss windows on survival and uptime. | Dionysus feels slow when stacks fall off, when the weapon hits too rarely, or when the run lacks a plan for armored enemies. | If Hangover is not carrying, use Dionysus as status support and add a direct boss-damage lane from the weapon, Artemis, Aphrodite, or Zeus. | Compare this page with a weapon route so the run has one main action instead of three half-built buttons. Weapon route |
| Use Dionysus on fast or repeated-hit buttons that can stack Hangover quickly. | The usual gap is not one perfect boon. It is missing uptime: no safe way to keep attacking, no status route, or no reason for the next keepsake. | Choose the next reward by function: damage if rooms drag, defense if Death Defiance is bleeding, status if Privileged Status or Duo access is the route. | Use a boon route to decide whether the next chamber should force a god, take a Pom, buy health, or stop chasing rarity. Boon route |
| After stacks are applied, move safely instead of standing still to force extra hits. | Boss failures usually mean the run cannot deal damage while moving, cannot leave after committing, or reaches the fight with too little health. | Use the next linked guide to decide whether the run needs a weapon route, a boon route, or a safer first-clear plan. | Move to a first-clear or setup page if the run needs more Mirror strength, safer keepsakes, or a less greedy boss plan. Recovery guide |
Boon Slot Fit Matrix
Judge the slot before taking the god
The same god can be excellent or mediocre depending on the slot. Use this matrix to decide whether the offer is carrying damage, adding safety, enabling status, controlling rooms, or crowding the build.
| Slot | Use when | Avoid when | Example route | Next read |
|---|---|---|---|---|
| Fast repeat hits that keep Hangover stacked while the player stays mobile. | Avoid slow actions that cannot refresh stacks before bosses reset pressure. | Fists, Rail, and repeat Special builds make Hangover easier to maintain than slow burst weapons. | Example route |
| Use Dionysus when you can apply status safely and let damage tick while repositioning. | If this condition is not true, treat the god as support instead of forcing the whole run around them. | Pair Hangover with safety, Privileged Status logic, or a direct burst lane for armored targets. | Pairing guide |
| If the ideal slot misses, keep the strongest current button as the carry and choose this god only for the job they still solve. | Do not replace a working boss plan just because a higher-rarity offer appears in the wrong slot. | The right pivot keeps damage, status, safety, and boss access connected instead of starting a second build too late. | Recovery route |
Route Data Table
Convert Dionysus Boons Guide into the next run
Broad guides need an execution order. This table compresses the route step, decision, evidence, and review signal into three rows so the reader leaves with a plan.
Table use
Take one row into the next attempt; return for the next row after the run.
| Route step | Decision | Evidence | Review signal |
|---|---|---|---|
| Plan the run | Use Dionysus on fast or repeated-hit buttons that can stack Hangover quickly. | The value of Hangover is not only its number. It changes how a fight feels because you can apply stacks, dodge a pattern, and still progress the health bar. This is why Dionysus is comfortable for players who are still learning when to leave a boss window. | Trying to use Hangover like instant burst damage. |
| Lock the build | Use Dionysus on fast or repeated-hit buttons that can stack Hangover quickly. | Fast attacks, multi-hit specials, and weapons that can safely tag an enemy several times love Dionysus. Slow single hits usually prefer Aphrodite, Artemis, or raw scaling unless the build is chasing a specific Duo or Festive Fog plan. | Applying stacks slowly on a weapon that should be using a different god. |
| Review the gap | Pair Hangover with defensive dashes or debuffs so bosses cannot punish the slower kill speed. | Hades Boon and Build Planning Guide | Do not keep forcing the same problem without a review signal. |
Boon Route Planner
Make the target eligible before spending resources
Strong boons are not pure luck. Check the slot, god pool, and prerequisite logic before swapping keepsakes or spending rerolls.
| Route | Prerequisite | Keepsake plan | Reroll timing | Fallback |
|---|---|---|---|---|
| Dionysus core slot | Decide whether this god should own Attack, Special, Cast, Dash, or Call before accepting mixed utility. | Wear the god keepsake early when the build needs this god to define the run instead of appear as a bonus. | Reroll only for the slot that carries the build; do not spend rerolls making every minor support boon perfect. | If the key slot misses, pivot this god into support and let the strongest existing button become the carry. |
| Duo handoff | After the core slot is solved, choose the partner god that naturally improves the same button, status plan, or cast route. | Swap keepsakes between biomes when the second god matters more than repeating the first god offer. | Use rerolls after both sides are live; before then, choose health, money, or Poms instead of forcing a dead pool. | If the Duo misses, keep the run coherent by Pomming the core boon and taking defensive support. |
| Boss-ready cleanup | Before Theseus, Asterius, or the final boss, ask whether the build has damage uptime, status safety, and enough health to use it. | Move away from god forcing once the core plan is online; Acorn, Tooth, money, or Pom value may solve the next biome better. | Late rerolls should repair a concrete missing piece, not gamble for style points. | Take the boring survival boon if it lets the already-good build reach the next boss with Death Defiance intact. |
People Also Ask
Dionysus Boons Guide FAQ
These answers are for search visitors and stuck players: resolve the most common decisions first, then continue into the deeper breakdown.
Q1How should I use this Dionysus Boons Guide?
+
Dionysus is forgiving because Hangover keeps working while you move. He is strongest when a weapon can apply stacks quickly, then back away while damage over time continues. For beginners, that makes him a calm alternative to greedier burst builds. Do not try to memorize the entire guide at once. Take one route question into the next run.
Q2What player problem does Dionysus Boons Guide solve first?
+
Use Dionysus on fast or repeated-hit buttons that can stack Hangover quickly. Solve the problem that kills the next run before optimizing smaller build gains.
Q3What should I read after Dionysus Boons Guide?
+
Fast attacks, multi-hit specials, and weapons that can safely tag an enemy several times love Dionysus. Slow single hits usually prefer Aphrodite, Artemis, or raw scaling unless the build is chasing a specific Duo or Festive Fog plan. If the failure point remains, move to the related boss, weapon, keepsake, or resource page that answers the next layer.
Q4What should I avoid when applying Dionysus Boons Guide?
+
Trying to use Hangover like instant burst damage. Applying stacks slowly on a weapon that should be using a different god.
Best Picks Breakdown
Actionable notes by section
Entry 1
Damage while moving
The value of Hangover is not only its number. It changes how a fight feels because you can apply stacks, dodge a pattern, and still progress the health bar. This is why Dionysus is comfortable for players who are still learning when to leave a boss window.
Visual Note
Hangover stacks
Dionysus rewards landing a few safe hits, then resetting before the boss answers.
Entry 2
Best weapon behavior
Fast attacks, multi-hit specials, and weapons that can safely tag an enemy several times love Dionysus. Slow single hits usually prefer Aphrodite, Artemis, or raw scaling unless the build is chasing a specific Duo or Festive Fog plan.
Visual Note
Damage over time
Damage continues while you dodge, which is why Dionysus is so friendly to learners.
Entry 3
Hangover is a stacking plan
Dionysus feels weak when Hangover is applied too slowly or to the wrong button. He feels excellent when one fast action keeps stacks active while you dodge. Fists, Rail, fast Specials, and safe Cast or Festive Fog routes can let damage continue while you focus on survival.
Visual Note
Hangover stacks
Apply stacks with a fast button, then move before the answer.
Entry 4
Why Dionysus helps first clears
Damage over time is forgiving because it pays you while you are moving away. That makes Dionysus useful for players who understand openings but cannot stay close safely yet. The goal is not to stand still and watch poison tick; it is to apply stacks, leave cleanly, and reapply before the pressure falls off.
Visual Note
Safe damage over time
Dionysus lets damage continue while the player resets spacing.