Use Matrix
Pick the usable route
Use this as a quick navigation board: scan each fight or build decision, then jump to the full breakdown and source frames below.
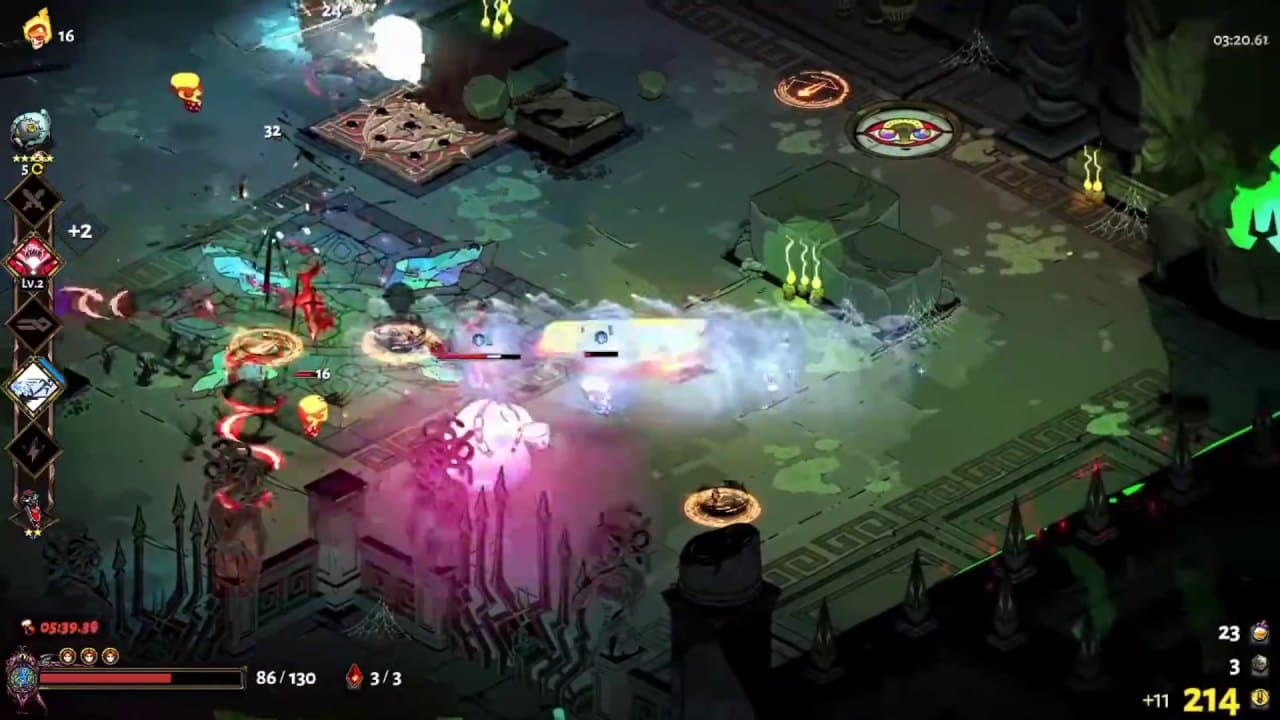
Why it works for first clears
Shield is forgiving because it gives players a defensive button that actually changes decisions. Instead of guessing whether a boss pattern can be dodged, you can block, observe, then choose when to move. This slows the run down, but it creates much cleaner learning.
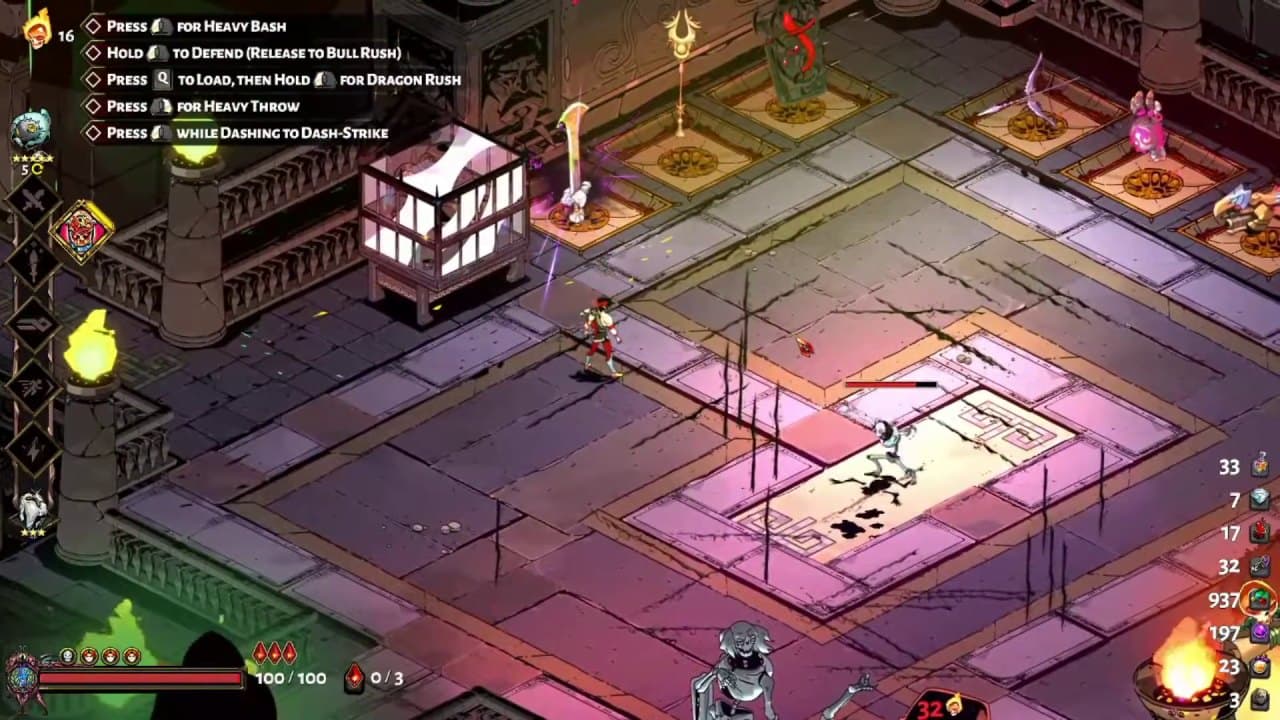
Aspect direction
Base Shield and Zagreus aspect are simple training tools. Chaos Shield rewards Special-based play. Beowulf Shield turns Cast loading into heavy burst. Pick the aspect that matches the button your build wants to scale.
Block first, punish second
Shield feels strongest when it is used as a permission tool rather than a slow melee weapon. Block the dangerous answer, watch the enemy commit, then release Bull Rush or a short attack string once the threat has already passed. If you attack first and only block when panic starts, the Shield loses the reason it is safe.
When Shield solves a run
Choose Shield when your deaths come from contact damage, boss panic, or rooms that force too many simultaneous dodges. It gives you a reset button that most weapons do not have. The tradeoff is speed: if a room takes longer, that is acceptable as long as the run reaches later biomes with Death Defiance still intact.
Quick Verdict
Use Shield when a boss or room feels unreadable. Block first, Bull Rush through safe lanes, and attack only after the room has committed.
Blocking teaches patterns without spending health.
Bull Rush is movement and damage, not just an attack.
Chaos and Beowulf aspects turn the shield into a build engine.
Pre-Run Checklist
How to test Shield of Chaos in the next run
Shield aspects become stronger when the build has one clear damage delivery button.
Role
Give Shield of Chaos one job before investing
Blocking teaches patterns without spending health.
Check
Why it works for first clears
Button
Fund the button that actually carries damage
Athena Dash, Zeus or Dionysus Special for multi-hit setups, and Cast loading for Beowulf.
Check
Next read: Best Hades Weapon Aspects for Consistent Clears
Risk
Fix consistency before judging the ceiling
Holding block forever and never converting safe reads into damage.
Check
Next read: Hades Boon and Build Planning Guide
Player Intent Router
Choose the section that matches your current wall
High-retention guide pages do not force every player to read linearly. They help the player name the problem, act on it, then continue into the next useful page.
01 · Weapon fit
You want to know whether Shield of Chaos fits the run
Judge the weapon by the job it solves: safety, burst, range, status triggers, or resource routing. Do not choose only by tier-list strength.
Page action
Blocking teaches patterns without spending health.
02 · Main button
Your build is spreading damage across too many ideas
A weapon page should decide which button gets investment. Once the main button is clear, boons, hammers, and keepsakes have direction.
Page action
Athena Dash, Zeus or Dionysus Special for multi-hit setups, and Cast loading for Beowulf.
03 · Consistency fix
The weapon feels strong, but clears are unstable
That usually means spacing, boss windows, or boon routing are not serving the weapon rhythm. Change one variable before replacing the whole route.
Page action
Holding block forever and never converting safe reads into damage.
Field Guide
How to use this page
Shield of Chaos should not be treated as a trivia entry. Use it as a route decision before the next run: identify the current wall, then choose the lowest-execution answer that solves that wall.
If the problem is survival, prioritize safer spacing, keepsakes, Mirror choices, or weapon rhythm. If the problem is damage, identify which button carries the build. If the problem is resources, spend on upgrades that improve several future runs instead of only the current attempt.
Screenshots and video references are support material: they help you read tells, spacing, reward locations, or build direction. The written conclusions are the part to carry into the run.
Before entry
Use this Weapon page to name the real job first: survival, damage, resources, or route clarity. A specific job keeps the run from being pulled off course by rarity, flashy clips, or tempting side rewards.
During the fight
Compress the advice into one action rule: wait for the tell, preserve spacing, clear adds first, take the core boon, or leave before greed damage begins. Good guidance should survive a messy screen.
After failure
Do not only ask whether the damage was high enough. Ask where health started disappearing, which reward did not serve the route, and whether the next run needs a different keepsake, Mirror setup, aspect, or starting god.
After reading Shield of Chaos, do not jump straight to an unrelated entry. Test the advice in one run by changing a single variable: starting keepsake, primary damage button, boss phase plan, resource spending order, or the positioning shown in the reference frames. That makes the next review cleaner because you can tell which change actually improved the route.
If you only remember one rule: Shield of Chaos is useful because it reduces hesitation in the next run. Anything that helps you decide when to attack, retreat, reroute, or preserve resources is what actually improves clear consistency.
A database page works best when it turns small decisions into a stable route. Read this page, follow the related entries, then test the idea in one escape attempt so the guide becomes practice rather than trivia.
Takeaways
- 01
Blocking teaches patterns without spending health.
- 02
Bull Rush is movement and damage, not just an attack.
- 03
Chaos and Beowulf aspects turn the shield into a build engine.
Strategy Path
What to read next
Do not leave Shield of Chaos as an isolated note. Follow the route below to turn one useful answer into a complete escape plan.
01 · Build the route
Best Hades Weapon Aspects for Consistent Clears
After Shield of Chaos, use Best Hades Weapon Aspects for Consistent Clears to check the next decision layer: The best aspect is the one that gives your run a clear job. Achilles Spear supports Cast burst, Chiron Bow focuses Special damage, Beowulf Shield rewards loaded burst, Arthur Blade gives safety, and Hestia Rail creates disciplined reload shots.
02 · Build the route
Hades Boon and Build Planning Guide
After Shield of Chaos, use Hades Boon and Build Planning Guide to check the next decision layer: A good Hades build starts by deciding which button deals damage. Then you pick gods that scale that button, use keepsakes to control the first god, and avoid taking shiny boons that do not help the run’s core job.
03 · Build the route
Hades Beginner Guide: First Clear Route
After Shield of Chaos, use Hades Beginner Guide: First Clear Route to check the next decision layer: First clears are usually won by survival economy, not perfect damage. Spend Darkness on extra lives and dashes, unlock defensive keepsakes, choose one or two build goals, and treat every boss as a lesson in leaving early.
04 · Plan upgrades
Titan Blood
After Shield of Chaos, use Titan Blood to check the next decision layer: Spend Titan Blood on one or two aspects you will actually use. Do not spread it thinly across every weapon before you know your preferred playstyle.
Change one variable at a time along this path: setup first, boon route second, boss phase handling last. That makes it easier to tell which adjustment actually improved consistency.
Run Study Board
Turn the guide into one playable review loop
This page compresses 2 source references and gameplay frames into three steps: watch, apply, and review.
01 · WatchRead the danger in the frame first
Shield is forgiving because it gives players a defensive button that actually changes decisions. Instead of guessing whether a boss pattern can be dodged, you can block, observe, then choose when to move. This slows the run down, but it creates much cleaner learning.
Frame action
Use the shield to hold lanes before committing to Bull Rush.
02 · ApplyTurn the advice into one next-run change
Athena Dash, Zeus or Dionysus Special for multi-hit setups, and Cast loading for Beowulf.
Frame action
Blocking teaches patterns without spending health.
03 · ReviewReview the most expensive repeated mistake
Holding block forever and never converting safe reads into damage.
Frame action
Shield turns panic patterns into readable windows when you wait first.
Tactical Drill Table
Convert Shield of Chaos into four playable checks
This is not an encyclopedia summary. It is a next-run drill card: what to look for, what to do, what to avoid, and which page should fill the next gap.
01 · Observe
Define the job Shield of Chaos is doing
If you see
You are unsure whether attack, special, cast, hammer, or aspect investment should carry the run.
Do this
Blocking teaches patterns without spending health.
Do not
Do not spread resources across several damage ideas that do not support each other.
Next: Best Hades Weapon Aspects for Consistent Clears02 · Commit
Build around one damage button
If you see
Shield is forgiving because it gives players a defensive button that actually changes decisions. Instead of guessing whether a boss pattern can be dodged, you can block, observe, then choose when to move. This slows the run down, but it creates much cleaner learning.
Do this
Athena Dash, Zeus or Dionysus Special for multi-hit setups, and Cast loading for Beowulf.
Do not
Holding block forever and never converting safe reads into damage.
Next: Hades Boon and Build Planning Guide03 · Avoid
Fix consistency before chasing the ceiling
If you see
Normal rooms are already bleeding health before the build reaches bosses.
Do this
Bull Rush is movement and damage, not just an attack.
Do not
Do not force a high-tier aspect if the spacing, charge timing, or boss windows are not stable yet.
Next: Hades Beginner Guide: First Clear Route04 · Pivot
Use the next page to decide the next investment
If you see
The weapon works, but Titan Blood, hammers, and god routes are still competing.
Do this
Chaos and Beowulf aspects turn the shield into a build engine.
Build Synergy Board
Connect this page to a full route
Readers often leave when the page does not answer what to pair next. This board connects the advice to gods, keepsakes, weapons, resources, and the next guide.
Aspect role
Give Shield of Chaos a build job before spending
Pair with
Best Hades Weapon Aspects for Consistent Clears
A weapon should solve safety, burst, range, cast loading, or status application. Once the job is clear, god and hammer choices become easier.
Page check
Blocking teaches patterns without spending health.
Boon lane
Compress boons into one damage logic
Pair with
Hades Boon and Build Planning Guide
Attack, special, cast, dash, and call cannot all be the main plan. Choose the button that clears rooms and bosses, then fund it.
Page check
Athena Dash, Zeus or Dionysus Special for multi-hit setups, and Cast loading for Beowulf.
Upgrade gate
Test feel before spending Titan Blood
Pair with
Hades Beginner Guide: First Clear Route
Rare upgrades should go into forms you can repeat comfortably, not the one that looked strongest in a highlight video.
Page check
Holding block forever and never converting safe reads into damage.
Weapon Route Builder
Pick the main button before boons and upgrades
The useful way to read a weapon page is to connect aspect choice, main damage, hammer value, and boss safety into one route.
Route rule
Do not let Attack, Special, and Cast compete for resources. Give one button the main job for the run.
1. Name the weapon job
Beowulf needs loaded Cast damage and clean release windows; Chaos wants Special value without losing the Shield safety identity.
Build signal
Decide between blocking control, Bull Rush safety, Chaos Special spread, or Beowulf loaded burst before choosing boons.
Boss check
Use block to earn the window, not to delay decisions forever. Release only after the boss has committed.
2. Lock the boon carrier
Blocking teaches patterns without spending health.
Build signal
Attack, Special, Cast, Dash, or Call should have a job. If two buttons compete for the same boons, the run becomes harder to pilot.
Boss check
Before Elysium, ask whether your main button can damage a boss while you still have room to dodge.
3. Spend upgrades on the route
Favor hammers that preserve block safety or improve the chosen release pattern; avoid upgrades that make the Shield clumsy.
Build signal
Bull Rush is movement and damage, not just an attack.
Boss check
If the next boss punishes long commitments, value safety, range, reload discipline, or block timing over raw numbers.
Build Pivot Map
Recover the run when the key piece misses
A useful guide should not only name the perfect build. It should show how to save the run when a boon, hammer, or aspect choice misses. Read the signal, repair the gap, then pivot before the boss wall.
| Lane | Build signal | Missing piece | Pivot target | Recovery link |
|---|---|---|---|---|
| Decide between blocking control, Bull Rush safety, Chaos Special spread, or Beowulf loaded burst before choosing boons. | The weapon is being asked to do too many jobs: mixed buttons, awkward hammers, or boons that do not match the aspect rhythm. | Favor hammers that preserve block safety or improve the chosen release pattern; avoid upgrades that make the Shield clumsy. | Compare this page with a weapon route so the run has one main action instead of three half-built buttons. Weapon route |
| Blocking teaches patterns without spending health. | The usual gap is not one perfect boon. It is missing uptime: no safe way to keep attacking, no status route, or no reason for the next keepsake. | Choose the next reward by function: damage if rooms drag, defense if Death Defiance is bleeding, status if Privileged Status or Duo access is the route. | Use a boon route to decide whether the next chamber should force a god, take a Pom, buy health, or stop chasing rarity. Boon route |
| Bull Rush is movement and damage, not just an attack. | Boss failures usually mean the run cannot deal damage while moving, cannot leave after committing, or reaches the fight with too little health. | Use block to earn the window, not to delay decisions forever. Release only after the boss has committed. | Move to a first-clear or setup page if the run needs more Mirror strength, safer keepsakes, or a less greedy boss plan. Recovery guide |
Route Data Table
Make Shield of Chaos a weapon route, not just a ranking
Weapon pages can collapse into tier-list trivia. This table turns the advice into route decisions: when to choose the aspect, what to pair it with, and what failure tells you.
Table use
Change one build variable at a time so the review stays readable.
| Build lane | Best pairing | When it works | Failure sign |
|---|---|---|---|
| Primary button | Athena Dash, Zeus or Dionysus Special for multi-hit setups, and Cast loading for Beowulf. | Shield is forgiving because it gives players a defensive button that actually changes decisions. Instead of guessing whether a boss pattern can be dodged, you can block, observe, then choose when to move. This slows the run down, but it creates much cleaner learning. | Holding block forever and never converting safe reads into damage. |
| Boon package | Best Hades Weapon Aspects for Consistent Clears | Bull Rush is movement and damage, not just an attack. | Bull Rushing into a second hazard without an exit lane. |
| Upgrade spend | Hades Boon and Build Planning Guide | Chaos and Beowulf aspects turn the shield into a build engine. | Do not keep forcing the same problem without a review signal. |
People Also Ask
Shield of Chaos FAQ
These answers are for search visitors and stuck players: resolve the most common decisions first, then continue into the deeper breakdown.
Q1Is Shield of Chaos good for beginners?
+
Use Shield when a boss or room feels unreadable. Block first, Bull Rush through safe lanes, and attack only after the room has committed. It becomes much easier to learn when the weapon has one clear job and one primary damage button.
Q2Should Shield of Chaos build around attack, special, or cast damage?
+
Blocking teaches patterns without spending health. Do not fund three damage plans at once. Pick the most reliable button first, then make boons and hammers serve it.
Q3When is Shield of Chaos worth Titan Blood?
+
Base Shield and Zagreus aspect are simple training tools. Chaos Shield rewards Special-based play. Beowulf Shield turns Cast loading into heavy burst. Pick the aspect that matches the button your build wants to scale. Spend rare upgrades only after the aspect feels repeatable across normal rooms and bosses.
Q4What is the most common Shield of Chaos mistake?
+
Holding block forever and never converting safe reads into damage. Bull Rushing into a second hazard without an exit lane.
Best Picks Breakdown
Actionable notes by section
Entry 1
Why it works for first clears
Shield is forgiving because it gives players a defensive button that actually changes decisions. Instead of guessing whether a boss pattern can be dodged, you can block, observe, then choose when to move. This slows the run down, but it creates much cleaner learning.
Visual Note
Shield route
Use the shield to hold lanes before committing to Bull Rush.
Entry 2
Aspect direction
Base Shield and Zagreus aspect are simple training tools. Chaos Shield rewards Special-based play. Beowulf Shield turns Cast loading into heavy burst. Pick the aspect that matches the button your build wants to scale.
Visual Note
Build payoff
Shield aspects become stronger when the build has one clear damage delivery button.
Entry 3
Block first, punish second
Shield feels strongest when it is used as a permission tool rather than a slow melee weapon. Block the dangerous answer, watch the enemy commit, then release Bull Rush or a short attack string once the threat has already passed. If you attack first and only block when panic starts, the Shield loses the reason it is safe.
- Hold block when the room is unreadable; release only after the pattern is known.
- Bull Rush should create position, not only damage.
- Beowulf and Chaos reward planning the loaded burst before the fight gets messy.
Visual Note
Block discipline
Shield turns panic patterns into readable windows when you wait first.
Entry 4
When Shield solves a run
Choose Shield when your deaths come from contact damage, boss panic, or rooms that force too many simultaneous dodges. It gives you a reset button that most weapons do not have. The tradeoff is speed: if a room takes longer, that is acceptable as long as the run reaches later biomes with Death Defiance still intact.
Visual Note
Bull Rush lane
Aim Bull Rush to end in safety, not inside the next attack.